-
-
-
-
-
-
-
-
-
-
Par Miss Lantin le 14 Décembre 2014 à 12:50

When we were kids in Dublin, my younger sisters and I used to have fun wrapping up our presents at Christmas. I was very fussy about how to do it even back then.
We’d collect empty cereal, teabag and cracker boxes and put the gifts in them before we did our wrapping, as it’s always easier to wrap a box.
I try to use recyclable wrapping paper and minimise tape. I’m also keen on washi tape, which is printed with patterns and comes in different widths.
Here’s my method for the perfect wrapped present:
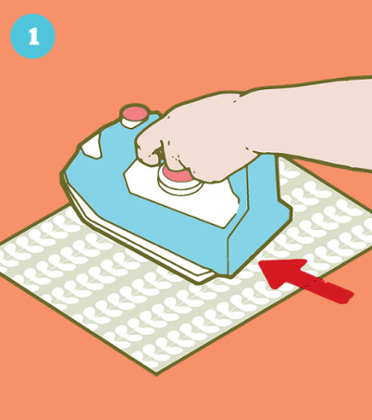
1 If you are reusing your paper, iron it. If the paper has a pattern, use the design as a guide to cut along. If your present is soft or odd-shaped, put it in a box. Lay the present upside down on the paper.
 All illustrations: Son of Alan
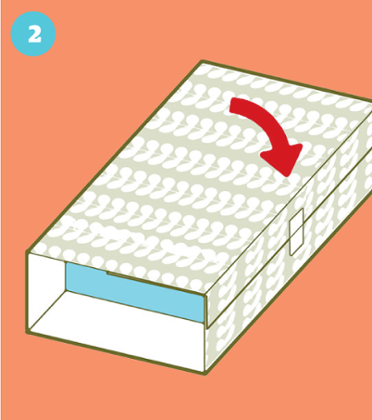
2 Ensure you have enough paper to fit around the present lengthways. Wrap the paper tightly around the present widthways, and affix with tape. Then cut the paper at the two shorter sides so that it measures to just under the depth of the present, and no more. That’s the secret: if you have too much paper you get lumpy sides.
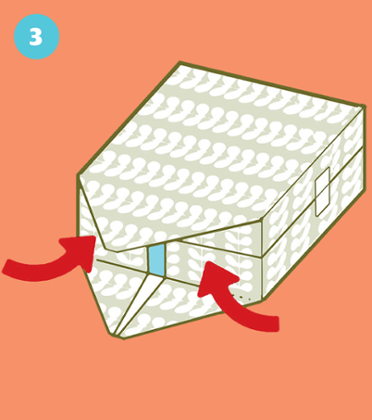
3 Fold in the two opposite short sides so that they are completely flat against the present. Then, when you fold in each of the four diagonal corners, there will be no lumps. It looks like origami when you do it properly.
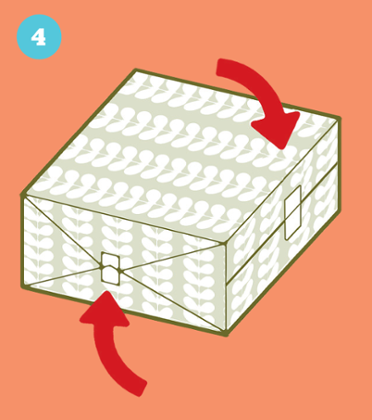
4 Keeping the paper as smooth as possible, pull the longer flaps up and fix with tape. Turn it over, and you have a perfectly wrapped present.
 How to wrap a present: 4. Photograph: Guardian
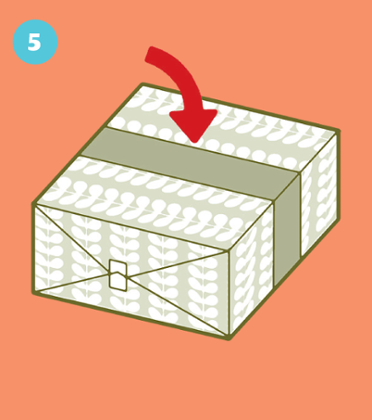
5 Time to decorate. If I wrap something in brown paper, I add a “belly band” round the middle. Cut a narrow strip of wrapping paper, wrap it tightly around the present and fix with tape.
 How to wrap a present: 5. Photograph: Guardian
6 I am very fussy about bows being perfectly horizontal. The secret is to loop the ribbon the opposite way to the one you think is correct. If I tie a bow anticlockwise, which feels right, it always ends up wonky.
 How to wrap a present: 6. Photograph: Guardian
As told to Rosanna Greenstreet
 Suivre le flux RSS des articles de cette rubrique


|
|
|
|